Embedded View
Introduction
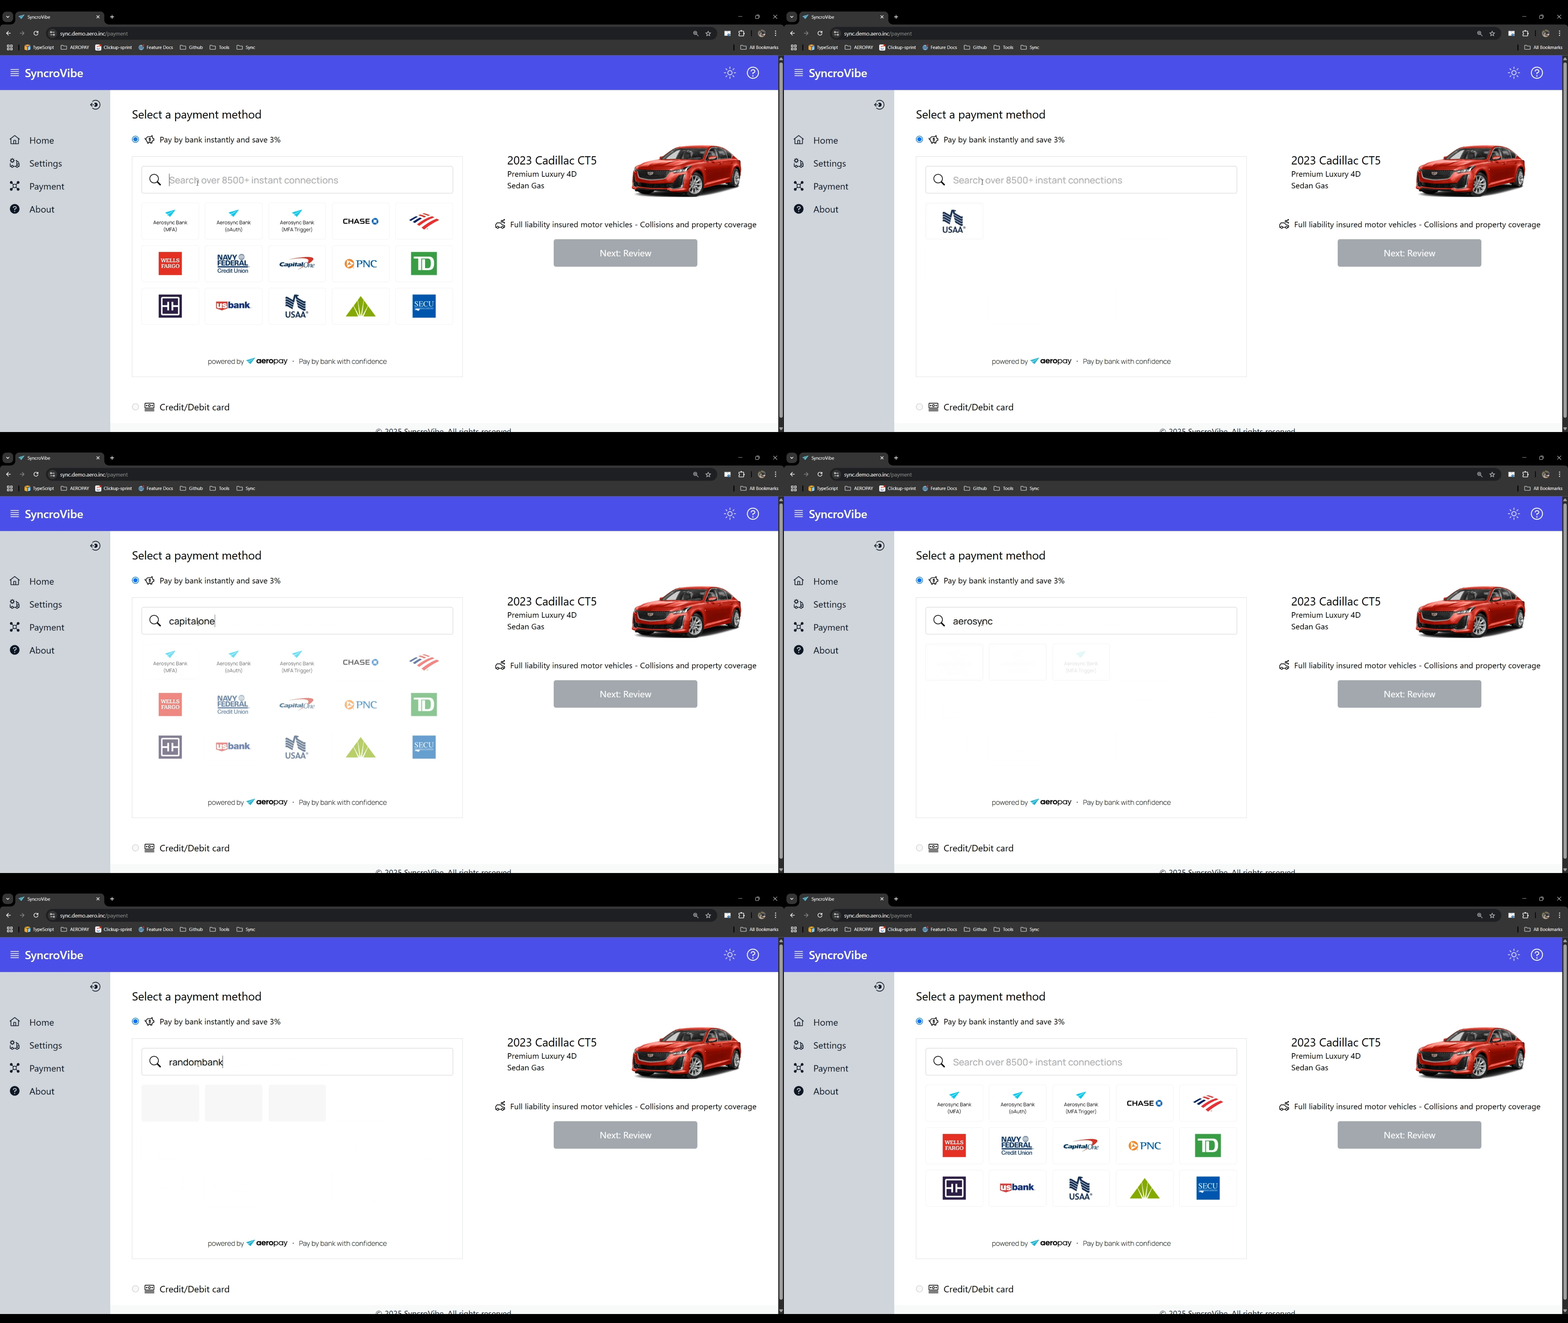
The Embedded View offers a streamlined alternative to the traditional Aerosync widget launch for Web NPM clients, enabling a seamless and intuitive user experience. By integrating the bank selection interface directly into your webpage, users can easily browse or search for their preferred bank without leaving your platform. Once a bank is selected, the Aerosync widget will be launched, allowing users to log in and link their bank accounts quickly and securely. This approach significantly reduces friction in the user journey & accelerates the linking process. For optimal performance and user satisfaction, we strongly recommend those leveraging the Web NPM SDK to adopt the embedded flow.

Setting Up the Embedded View
The example below demonstrates the minimal configuration required to display the embedded view of Aerosync’s bank list.
<!--
  Add a <div> with the ID 'embeddedId' where you want the embedded view to appear.
  The embedded view will automatically expand to fill the full width of its container.
  The 'embedded-container' class is just a placeholder—you can customize it as needed.
  If you prefer to manually control the embedded view's size, you can specify width and height
  in the widget configuration under 'embeddedBankView'.
-->

<div id="embeddedId" class="embedded-container"></div>

<!-- Add a <div> with the id 'widgetId' on the same page for the Aerosync widget.
     You can place it at the bottom of your page template or wherever fits best in your layout. -->
<div id="widgetId"></div>.embedded-container {
width: 100%;
height: 358px;
border: 1px solid #D1D5DB;
}
@media (min-width: 768px) {
.embedded-container {
max-width: 572px;
}
}import type { AerosyncWidget, WidgetEventSuccessType, WidgetEventType } from 'aerosync-web-sdk'
import { AerosyncEnvironment, initAeroSyncWidget } from 'aerosync-web-sdk'
let widgetControls: AerosyncWidget | null = null
const isSyncReady = ref(false)
function widgetRef() {
widgetControls = initAeroSyncWidget({
elementId: 'widgetId', // Id of the div widget element
embeddedBankView: {
elementId: 'embeddedId', // Id of the div embedded element
onEmbedded() {
isSyncReady.value = true // callback triggered when embedded view is ready
},
// width: '572px', // manually set the width of the embedded view
// height: '358px' // manually set the height of the embedded view
},
environment: AerosyncEnvironment.Production, // [Sandbox | Production]
token: widgetStore.widgetConfig.token, // Aerosync token
theme: isDark.value ? 'dark' : 'light',
onEvent(event: WidgetEventType) {
// log all Aerosync widget events
toast.info(`Sync onevent: ${event.payload.pageTitle}`)
},
onLoad() {
// triggered on Aerosync Widget load
toast.info('Sync onload')
},
onSuccess(event: WidgetEventSuccessType) {
// triggered when user successfully links the bank
// this marks the completion of the bank linking process
toast.success(`Sync onsuccess: ${JSON.stringify(event)}`)
},
onClose() {
// triggered when the widget is closed
// the user can close the widget using the 'X' icon or the 'Exit' button
toast.info(`Sync onclose`)
},
onError(event: string) {
// log all Aerosync widget errors
console.log('onError', event)
},
})
}
onMounted(() => {
widgetRef() // ensure the DOM is fully mounted before initializing the Aerosync widget
})
onUnmounted(() => {
widgetControls?.destroy() // clean up all components related to the Aerosync widget
})
// toggle between light and dark modes for the embedded view (optional)
watch(isDark, (newValue) => {
widgetControls?.toggleTheme(newValue ? 'dark' : 'light')
})Resizing the Embedded View
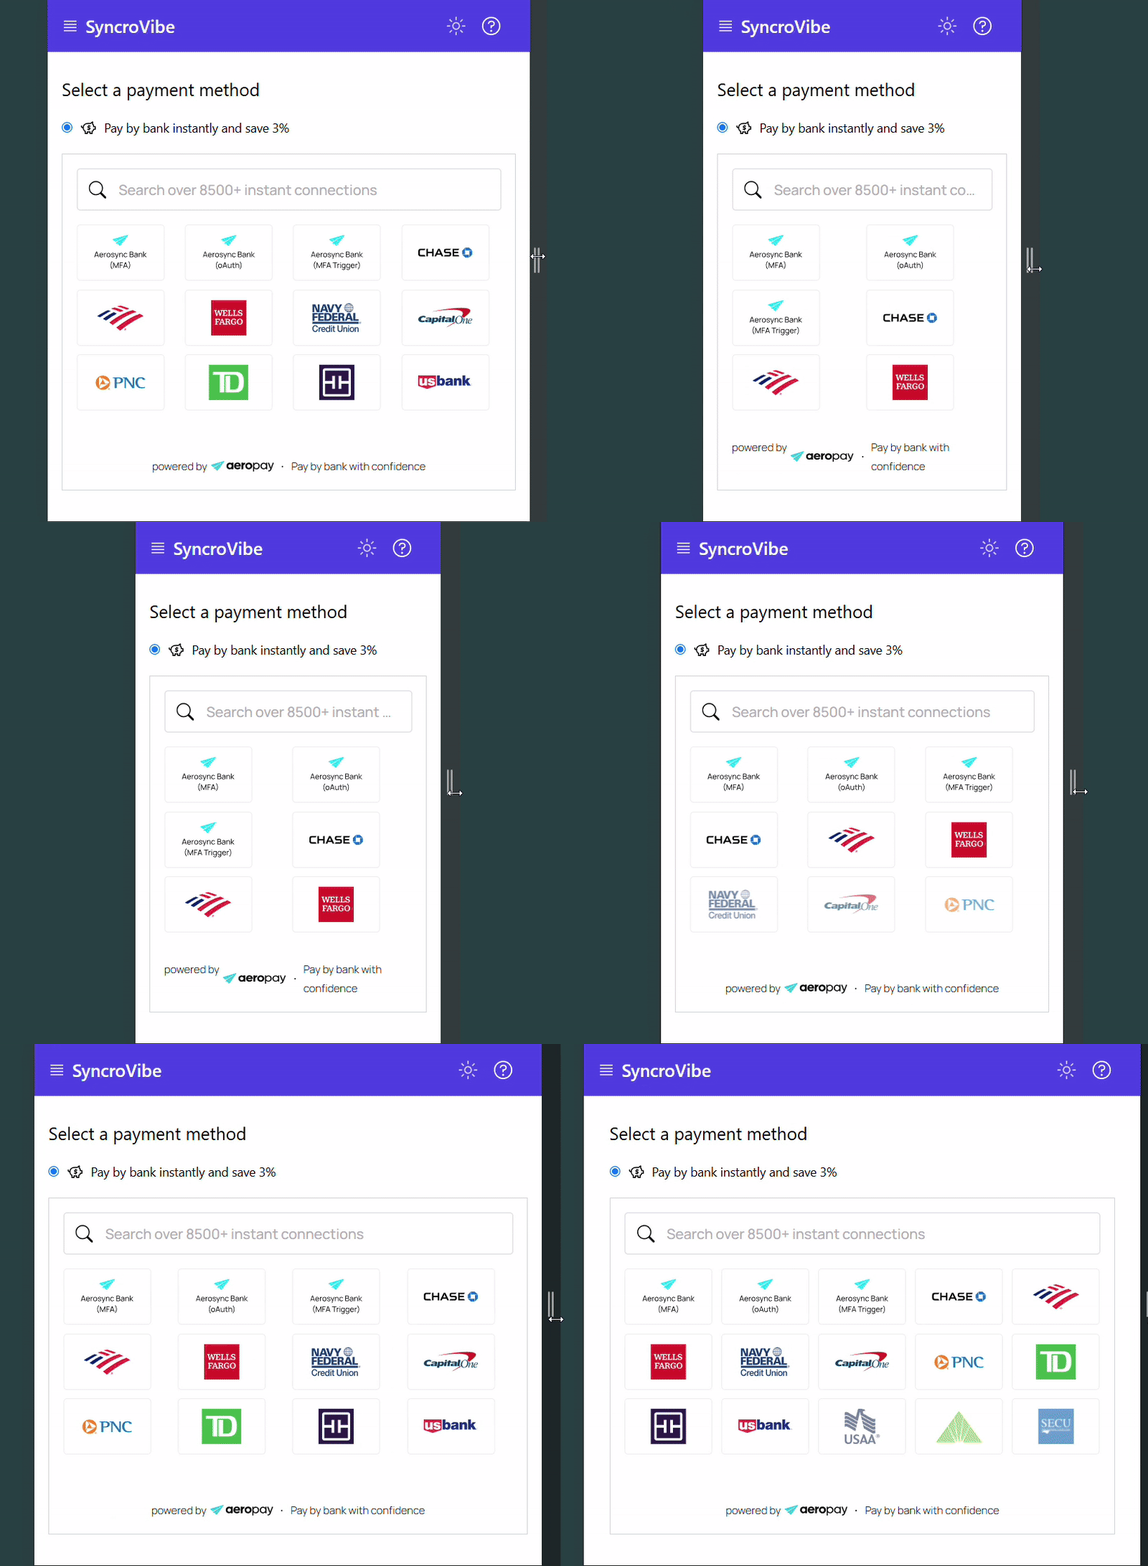
The embedded view is designed to be responsive across different screen sizes. As the available space changes, the number of tiles displayed within the view will adjust accordingly. This ensures an optimal layout for both small and large devices. The table below shows the number of tile rows and columns displayed at various screen breakpoints
| Width | Height | Rows | Columns |
|---|---|---|---|
| ≥ 572px | ≥ 356px | 3 | 5 |
| 464px – 571px | ≥ 356px | 3 | 4 |
| 356px – 463px | ≥ 356px | 3 | 3 |
| ≤ 355px | ≥ 356px | 3 | 2 |
| ≥ 572px | 282px – 355px | 2 | 5 |
| 464px – 571px | 282px – 355px | 2 | 4 |
| 356px – 463px | 282px – 355px | 2 | 3 |
| ≤ 355px | 282px – 355px | 2 | 2 |
| ≥ 572px | ≤ 281px | 1 | 5 |
| 464px – 571px | ≤ 281px | 1 | 4 |
| 356px – 463px | ≤ 281px | 1 | 3 |
| ≤ 355px | ≤ 281px | 1 | 2 |
There are two ways to resize the embedded view:

Inherit from the Embedded Container
The easiest option is to style the embedded container. The embedded view will automatically inherit its dimensions, making it responsive across all screen sizes. In this code, the .embedded-container sets a fixed height and responsive width, adapting to screen size. This ensures the embedded view automatically inherits the full dimensions of its container, making it responsive and properly scaled across devices.
<div id="embeddedId" class="embedded-container"></div>
<style>
.embedded-container {
  width: 100%;
  height: 358px;
  border: 1px solid #D1D5DB;
}

@media (min-width: 768px) {
  .embedded-container {
     max-width: 572px;
  }
}
</style>Manually Set Dimensions
Alternatively, you can directly set the width and height properties on the embedded view to control its size precisely.
<div id="embeddedId" class="custom-class"></div>
<style>
  .custom-class {;
    border: 1px solid #D1D5DB;
  }
</style>initAeroSyncWidget({
...
embeddedBankView: {
elementId: 'embeddedId', // Id of the div embedded element
width: '572px', // manually set the width of the embedded view
height: '358px' // manually set the height of the embedded view
},
...
})Demo
To quickly test the embedded view, you can either:
Visit the following URL
Note: Ask support team for credentials
Or clone the GitHub repository:
https://github.com/Aeropay-inc/sync-web-sdk-internal
Updated 9 months ago
